Although it is customary to go to a beauty salon to apply acrylic nails, the truth is that your procedure is not complicated and could be done at home. However, it is necessary to practice previously to master the technique, so if you plan to try it, it is best to rehearse in advance and have the help of someone who is nearby in case you need it. Let’s do it at msmee.com! Remove the cuticles. These should not touch the acrylic, so it is convenient that you remove them or push them back as far as you can. For this use a cutter, a cuticle mould or a wooden stick, and do so after soaking your fingers in warm water for a few minutes, so your cuticles will be softer and easier to mould.
Use the blotter. It is a base for nails that is responsible for drying it completely and removing any trace of oil on the surface of the nail, so the acrylic will adhere correctly. If the oil is not completely removed, it will not be fixed and this step will have to be repeated. To apply the base, use a small cotton swab and prevent the blotter from coming in contact with your skin. Choose the pieces. Once you have finished with the cleaning process, your nails are ready for you to hit the artificial ones. Choose those pieces that have the same size of each one of your nails and if not, with the file for acrylic nails give them the form until they fit. Acrylic nails step by step – Materials, Designs and Care at www.msmee.com
Stick the nails. With the adhesive for acrylic nails, join your natural nail with the artificial nail and press for 5-10 seconds to fix it properly. You should not apply much glue but enough to adhere from end to end; In addition, you must avoid that the stick makes contact with your skin. If it becomes bad, you can remove it by immersing the nail in warm water for a few minutes, but it must be done immediately before the paste dries more. Prepare the acrylic. Before starting to do so, you should make sure you work in a ventilated area since this material contains gases that can be toxic to those who aspire to them. When your work area is ready, pour the acrylic liquid into the container for that purpose and in another place the acrylic powder.
Apply the acrylic. With an acrylic, brush pick up a little of the liquid and remove the excess on the edge of the container. Then, submerge the brush in the dust container. At the tip of the brush should be formed immediately a homogeneous pastes easy to spread. Next, apply that drop of acrylic on the base of the acrylic nail and with a gentle but sure movement, spread it along the nail to cover it all. These you must repeat on each nail and most likely you need to apply two drops each to get the nails are curved. Let them dry. It may take between ten and fifteen minutes for the acrylic to dry on the nail. After that time corroborates if the nails make a slight click when hitting its surface with the handle of the brush. If so, they are dry.
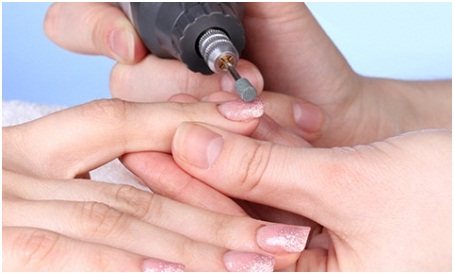
Give them shape. With the help of a nail clipper for acrylic nails, a file for acrylic nails and a polisher you can give them the shape that you like the most. Paint them and decorate them. This step is the most fun of all, it is the time to endow your nails with the design that you like. You can try from a layer of simple brightness to various tones and patterns. Have a look at www.msmee.com.